Table of Contents
Introduction
Hello everyone! Welcome to the ultimate guide on how to clean earring holes. Have you ever slipped on your favorite pair of earrings, only to be met with a not-so-friendly itch or discomfort? But fear not, fashion lovers and jewelry fans, for we’re about to embark on a journey to unlock the secrets of how to clean earring holes like a pro.
Imagine you’re gearing up for a fabulous night out, ready to dazzle the town with your excellent style. As you beautify yourself with those stunning earrings you love, a tiny whisper of discomfort begins to nag at your earlobes. It’s the indicative sign that those little crevices we call earring holes might need a bit of TLC.
Now, before you start fretting about infections or discomfort, let’s take a deep breath together. Cleaning your earring holes isn’t rocket science, it’s a simple yet essential step in your self-care routine. Just like brushing your teeth or washing your face, giving those earring holes a little love can make all the difference in the world.
In this guide, we’re going to dive headfirst into the world of earring hygiene, exploring the ins and outs of how to clean earring holes with finesse and flair. Whether you’re a pro earring enthusiast or a newcomer to the dazzling realm of ear adornments, we’ve got you covered.
So, grab your favorite pair of earrings (yes, the ones that make you feel unstoppable), and let’s begin this sparkling adventure together. To keep those earring holes clean, a little knowledge and an energy of confidence are all you need to shine bright like a diamond.
Understanding Earring Holes
Let’s talk about the hidden heroes of our earlobes, those tiny, often overlooked crevices we affectionately refer to as earring holes. You are thinking now what’s important in it. They’re just little holes. So get ready, for these tiny marvels are more complex than they first appear.
First things first, let’s disprove a common misconception, earring holes aren’t just empty spaces waiting to be filled with fabulous jewelry. Nope, they’re actually quite the bustling hub of activity. You see, our earlobes aren’t just skin-deep, they’re home to a complex network of glands, follicles, and yes, earring holes.
But why should you care about these seemingly insignificant holes? This is where things start to get interesting. Those earring holes may be small, but they’re mighty magnets for dirt, debris, and you guessed it bacteria. And trust me, you don’t want your earlobes playing host to uninvited guests.
So, why does this matter in this guide on how to clean earring holes? Let’s put it this way, dirty earring holes are like a breeding ground for all sorts of nasties, from pesky germs to potential infections. And nobody wants to deal with the aftermath of neglecting proper ear hygiene.
But don’t worry, for all hope is not lost. Armed with the right knowledge and a sprinkle of spirit, you can tackle those earring holes like a seasoned pro. In the next section, we’ll dive into the magical realm of how to clean earring holes, ensuring your earlobes stay happy, healthy, and ready to rock those fabulous earrings.
So, be patient and settle in, and let’s unravel the mysteries of earring hygiene together in this guide on how to clean earring holes.
Preparing for Cleaning
Okay, people, before we get into the specifics of how to clean earring holes, let’s make sure we’re all set up and ready to go. Think of it like getting all your ingredients together before baking a delicious cake, preparation is key.
First of all, let’s gather our supplies. You’ll need a few simple things for this cleaning session.
1. Saline Solution: This gentle solution will help clean your earring holes without causing any irritation.
2. Cotton Balls or Pads: Perfect for applying the saline solution and wiping away any buildup.

3. Mild Soap: Select a mild, fragrance-free soap to ensure your ears stay happy and healthy.
4. Towel or Tissue: For drying off your earlobes after cleaning. We don’t want any dampness lingering around.
Once you’ve got your supplies ready, it’s time to set the stage for a successful cleaning session, and follow the steps of this article on how to clean earring holes. Find a comfortable spot with good lighting, and make sure you have everything within reach. Don’t forget to wash your hands thoroughly before we get started, clean hands to make for clean ears.
Now, take a deep breath and relax. Cleaning your earring holes shouldn’t be stressful, think of it as a little self-care moment for your ears. So put on your favorite tunes, pour yourself a cup of tea, and let’s show those earring holes some love.
In the next section, we’ll walk through the step-by-step process of how to clean earring holes like a pro. So, grab your supplies and get ready to flare.
How to Clean Earring Holes? Step-by-Step Cleaning Guide
Now that we’ve got everyone suited up, let’s get started. Cleaning your earring holes is about to become a breeze with this simple, step-by-step guide on how to clean earring holes.
Step 1: Gently Remove Earrings
First of all, take a moment to remove your earrings carefully. You don’t want to accidentally tug or pull on your earlobes, gentle is the name of the game here.
Step 2: Cleanse the Earrings
Now, let’s give those earrings a little TLC of their own. Take a cotton ball or pad and dampen it with some mild soap and water. Gently wipe down your earrings to remove any dirt or buildup, they’ll be sparkling like new in no time.
Step 3: Clean the Earlobes
Here’s where the magic happens. Dip a fresh cotton ball or pad into your saline solution and carefully clean around your earlobes, paying special attention to those earring holes. Gently massage the solution into the holes to help remove any stubborn dirt.
Step 4: Rinse and Dry
Once you’ve finished cleaning, it’s time to rinse away any residue. Use a clean cotton ball or pad dampened with water to gently rinse your earlobes and remove any remaining solution. Then, pat your ears dry with a towel or tissue, no need to rub, just dab gently.
And there you have it clean, happy earlobes ready to rock your favorite earrings once again. Wasn’t that easy? Now, sit back, admire your handiwork, and revel in the feeling of fresh, sparkling ears. For the future, remember this guide’s steps on how to clean earring holes.
You are also advised to handle the tasks besides cleaning your earring holes. Explore more cleaning tips for additional body parts like cleaning your teeth with baking soda to optimize your brightened smile and ensure freshness, and also pay attention to cleaning your eyes to improve your vision. In the next section, we’ll cover some additional tips and tricks to help you maintain those fresh earring holes. So stay tuned, and keep shining bright.
Do’s and Dont’s
It’s crucial to properly maintain your earring holes by understanding not just what actions to take, but also what to avoid. Here are some common mistakes and misconceptions to keep in mind.
| Mistake | Why to Avoid | What to Do Instead |
|---|---|---|
| Using Harsh Chemicals | Harsh chemicals can irritate the skin, cause allergic reactions, and damage the earring material. | Use a gentle, non-toxic solution like saline solution or mild soap diluted in warm water. |
| Not Rinsing Properly | Leaving residue in the earring hole can lead to irritation and infection. | Thoroughly rinse the earring hole with clean water after cleaning. |
| Overcleaning | Excessive cleaning can disrupt the natural balance of the skin and lead to irritation. | Clean the earring holes only when necessary, typically once a day or as needed. |
| Using Abrasive Materials | Abrasive materials like rough cloths or brushes can scratch the skin and increase the risk of infection. | Use soft materials like cotton balls or pads for cleaning. |
| Skipping Drying Step | Moisture left in the earring hole can create a breeding ground for bacteria. | Gently pat the area dry with a clean, soft cloth after cleaning. |
Additional Tips and Considerations
We’ve covered the basics of how to clean earring holes, but why stop there? Let’s go deeper into some extra tips and considerations to keep those earlobes shining bright like diamonds.
Tip 1: Avoid Harsh Chemicals
Less is definitely more when it comes to cleaning your earring holes. Avoid using harsh chemicals or alcohol-based solutions, as they can dry out your skin and cause irritation. Stick to gentle, mild cleansers to keep your earlobes happy and healthy.
Tip 2: Regular Inspections
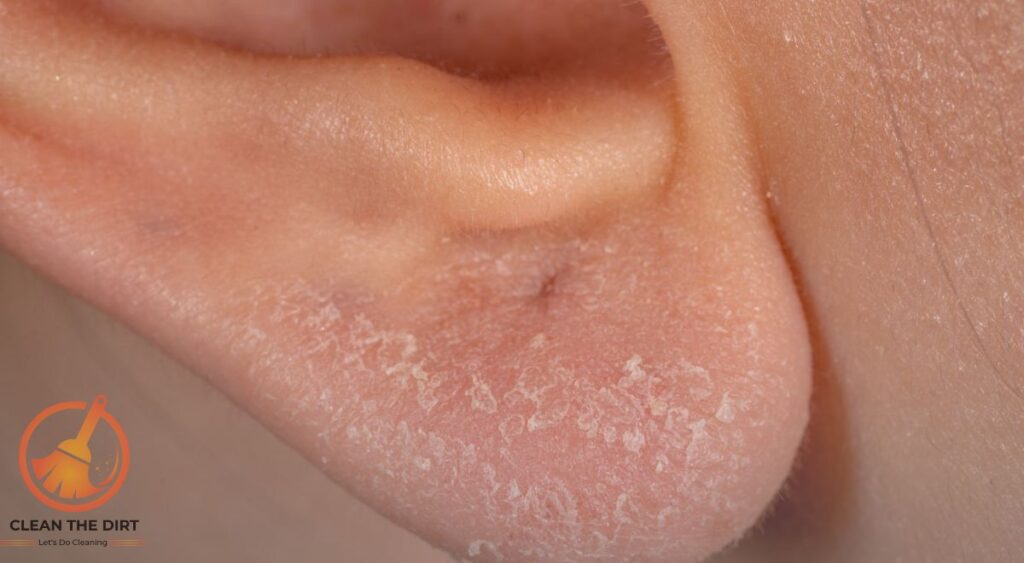
Make it a habit to give your earrings and earlobes a quick and short inspection. Look out for any signs of redness, swelling, or irritation, these could be early warning signs of an infection. If you notice anything out of the ordinary, give your ears a break from earrings and contact a healthcare professional if needed.
Tip 3: Rotate Your Earrings
Give your ears a breather by switching up your earrings regularly. Wearing the same pair day in and day out can put pressure on your earlobes and increase the risk of irritation. Plus, it’s a great excuse to show off your dazzling earring collection.
Tip 4: Be Mindful of Allergies
If you have sensitive skin or known allergies, be extra cautious when choosing earrings. Pick hypoallergenic materials like sterling silver or surgical steel to minimize the risk of irritation. And remember, if a pair of earrings is causing discomfort, it’s okay to say goodbye your earlobes deserve only the best.
Tip 5: Listen to Your Body
Last but not least, pay attention to what your body is telling you. If your earlobes are feeling upset or irritated, give them a break from earrings for a few days. Sometimes, a little rest is all they need to bounce back to their sparkling selves.
Now you have covered all the possible tips of this guide on how to clean earring holes to elevate your earring game to the next level. Remember, taking care of your earlobes is all about balance and moderation. So keep shining, keep sparkling, and above all, keep those earring holes clean and fresh.
Conclusion
Now we’ve reached the end of our sparkling journey through the world of how to clean earring holes. But before we part ways, let’s take a moment to reflect on all we’ve learned and celebrate those squeaky-clean earlobes.
Throughout this guide on how to clean earring holes, we’ve delved into the importance of keeping your earring holes clean and neat. We’ve uncovered the secrets of gentle cleansing and explored tips and tricks to elevate your earring game to new heights.
But beyond the practicalities, this journey has been about more than just cleaning earring holes. It’s been about self-care, self-expression, and self-love. Because when we take the time to care for ourselves, whether it’s through cleaning our earring holes or fulfilling a little retail therapy, we’re saying “Hey, I’m worth it.”
So, as you go forth and let your ears sparkle with confidence, remember this you are worthy of love, care, and all the sparkle in the world. Whether you’re rocking a pair of statement studs or your favorite dangly delights, wear them proudly and let your inner light shine through.
And if ever you find yourself in need of a little refresher on the art of earring hygiene, just remember we’re always here to lend a helping hand. Because at the end of the day, we’re all on this sparkling journey together and we have followed the steps of the guide on how to clean earring holes.
Let’s take a look at the comparison table for earring hole cleaning methods and their pros and cons.
| Cleaning Method | Pros | Cons |
|---|---|---|
| Saline Solution | – Gentle and non-irritating – Effectively removes debris | – Requires preparation – May not be readily available |
| Mild Soap and Water | – Easily accessible – Provides thorough cleansing | – Potential for irritation if not rinsed properly – Can be drying to the skin |
| Alcohol Swabs | – Antiseptic properties – Convenient for on-the-go cleaning | – Harsh on the skin – May cause dryness and irritation |
| Hydrogen Peroxide | – Antiseptic and disinfectant properties | – Too harsh for regular use – Can cause irritation and dryness |
So go ahead, let your ears sparkle, and may your adventures be as dazzling as your earrings.
Frequently Asked Questions (FAQs) for How to Clean Earring Holes?
Why is it important to clean earring holes?
Cleaning earring holes is crucial for maintaining ear hygiene and preventing infections. Dirt, bacteria, and debris can accumulate in earring holes, leading to discomfort and potential health issues if left untreated.
How often should I clean my earring holes?
It’s recommended to clean your earring holes regularly, ideally every time you remove your earrings. However, if you wear earrings daily, aim to clean your earring holes at least once a week to prevent buildup and maintain cleanliness.
What’s the best way to clean earring holes?
The best way to clean earring holes is with a gentle saline solution or mild soap and water. Use a cotton ball or pad to apply the solution to the earlobes and earring holes, gently massaging to dislodge any debris. Rinse thoroughly with water and pat dry with a clean towel or tissue.
Can I use alcohol to clean my earring holes?
It’s generally not recommended to use alcohol to clean earring holes, as it can dry out the skin and cause irritation. Stick to gentle cleansing solutions like saline solution or mild soap to avoid discomfort and maintain ear health.
What should I do if my earring holes become infected?
If you suspect your earring holes are infected, remove your earrings immediately and clean the area with a saline solution. Avoid wearing earrings until the infection clears up, and consult a healthcare professional if the symptoms persist or worsen.
How can I prevent infections in my earring holes?
To prevent infections in your earring holes, practice good hygiene by cleaning your earlobes and earrings regularly. Avoid wearing earrings that may cause irritation or allergic reactions, and ensure your hands are clean before touching your ears or earrings.
Can I use hydrogen peroxide to clean my earring holes?
While hydrogen peroxide may have antiseptic properties, it can be too harsh for cleaning earring holes and may irritate. It’s best to stick to milder cleansing solutions like saline solution or mild soap and water.
You May Also Like: The Complete Guide: How to Clean Your Ears in the Shower?

