Table of Contents
Introduction
Welcome to the ultimate guide on how to clean headlights with WD40. Have you noticed your headlights starting to lose their sparkle, casting a dim glow instead of the bright beams they once emitted? If so, you’re not alone. Over time, headlights can become dull and foggy due to exposure to the elements, road debris, and UV rays. Not only does this affect the aesthetics of your vehicle, but it also compromises your safety on the road by reducing visibility, especially during nighttime driving or in adverse weather conditions.
But don’t worry, there’s a simple and effective solution to restore your headlights to their former glory, and it involves a household product you might not expect that item which is WD40. Yes, that’s right, the same versatile product you reach for when dealing with squeaky hinges or rusty bolts can also work wonders on dull headlights.
In this comprehensive guide on how to clean headlights with WD40, we’ll delve into the art of headlight restoration using WD40, providing you with step-by-step instructions, insider tips, and all the information you need to achieve crystal-clear results. Whether you’re a seasoned car fan or a beginner, you’ll find everything you need to know to revitalize your headlights and enhance your driving experience.
So, grab your trusty can of WD40, and let’s embark on a journey to brighter, safer roads together.
Introducing the WD40 Method
Now it’s time to introduce you to a game-changing solution: the WD40 method for how to clean headlights with WD40. You may be thinking, “Wait, isn’t WD40 just for cleaning squeaky doors and removing stubborn bolts?” Well, yes, WD40 is indeed a versatile product known for its myriad of household uses. But what you might not know is that it’s also a secret weapon when it comes to headlight restoration.
So, how does it work? Well, the magic lies in WD40’s unique formula, which combines lubricating oils with anti-corrosion agents to penetrate and dissolve stubborn grime and oxidation. When applied to cloudy or yellowed headlights, WD40 works its wonders by breaking down the oxidation layer and lifting away dirt and debris, revealing the clear, glossy surface beneath.
But that’s not all. One of the great things about the WD40 method is its simplicity and accessibility. Unlike other headlight restoration products that require specialized tools or expensive kits, you only need a can of WD40 and a little work to get started. Plus, it’s a quick and easy process that can be done right in your own driveway, saving you time and money compared to professional detailing services.
So, if you’re tired of driving around with dull, lackluster headlights, it’s time to give the WD40 method a try. With just a few simple steps, you can unlock the brilliance of your headlights and enjoy clearer, safer travels on the road. Ready to see the difference for yourself? Let’s roll up our sleeves, understand the steps of this guide on how to clean headlights with WD40, and get started on transforming your headlights from drab to fab.
Preparing for Cleaning
Before we dive into the exciting world of how to clean headlights with WD40, let’s take a moment to prepare for the task ahead. Just like any DIY project, a little preparation goes a long way in ensuring a successful outcome. So, let’s gather our materials and get ready to restore those headlights to their former glory.
First of all, you’ll need to assemble a few key items for the cleaning process. Here’s what you’ll need for this task.
1. WD40
Of course, our star player for this project. Make sure you have a fresh can of WD40 on hand to work its magic on your headlights.
2. Microfiber cloths or soft towels
These will be used for applying and wiping away the WD40, so it’s important to choose lint-free cloths to avoid leaving behind any residue.
3. Water
A small bucket or spray bottle filled with water will come in handy for rinsing off the headlights and cleaning any leftover debris.
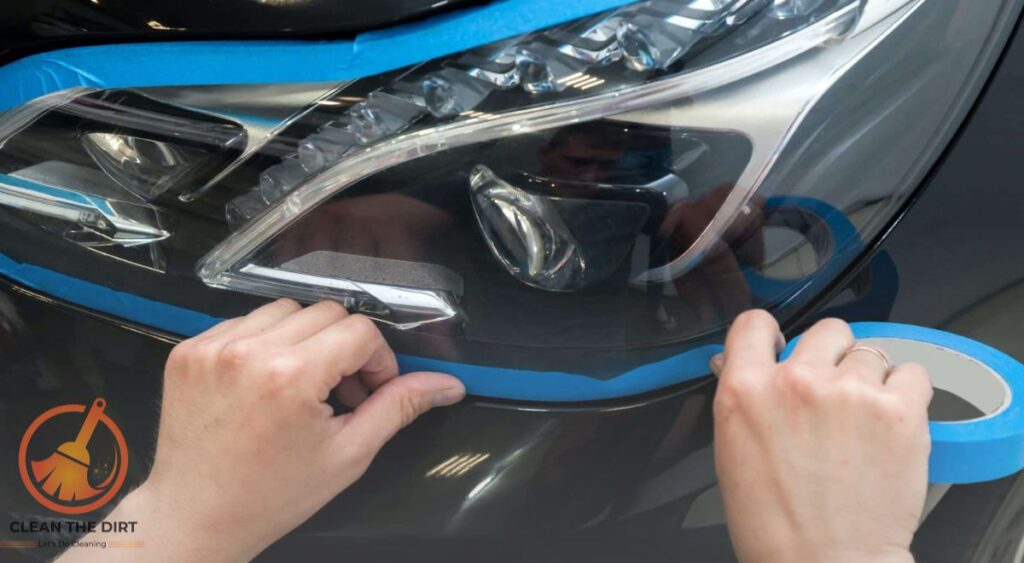
4. Masking tape
While not essential, masking tape can be useful for protecting the surrounding areas of your vehicle from overspray during the cleaning process.
5. Optional
If you want to give your headlights an extra layer of protection and shine after cleaning, consider having some car wax or sealant on standby.
Now that you’ve gathered your materials, it’s time to prepare the headlights themselves for cleaning. Start by giving them a thorough rinse with water to remove any loose dirt or debris. If your headlights are particularly dirty, you may want to use a mild soap or automotive shampoo to help loosen stubborn grime.
Once the headlights are clean and dry, it’s time to mask off any areas you don’t want to get WD40 on. Use the masking tape to protect the surrounding paintwork, trim, and any other sensitive areas of your vehicle.
With your headlights prepped and your materials at the ready, you’re now all set to dive into the exciting world of how to clean headlights with WD40. So grab your supplies, roll up your sleeves, and get ready to witness the transformative power of how to clean headlights with WD40 firsthand. Let’s do this together.
How to Clean Headlights With WD40? Step-by-Step Cleaning Process
Now that we’ve got everything we need, it’s time to prepare yourself and dive into the step-by-step process of how to clean headlights with WD40. Get ready to witness the magic unfold as we restore clarity and shine to your headlights in just a few simple steps.
Step 1: Apply WD40
- Shake the can of WD40 well to ensure the formula is properly mixed.
- Spray a generous amount of WD40 directly onto the surface of one headlight lens. Be sure to cover the entire lens evenly with the product.
Step 2: Spread and Massage
- Use a clean microfiber cloth or soft towel to spread the WD40 evenly across the surface of the headlight lens. This will help to ensure that the product penetrates into any cracks or crevices where dirt and grime may be hiding.
- Massage the WD40 into the lens using gentle circular motions. This will help to loosen and lift away any stubborn oxidation or debris.
Step 3: Let it Sit
- Allow the WD40 to sit on the headlight lens for a few minutes to work its magic. During this time, the formula will continue to break down oxidation and grime, making it easier to remove.
Step 4: Wipe Away
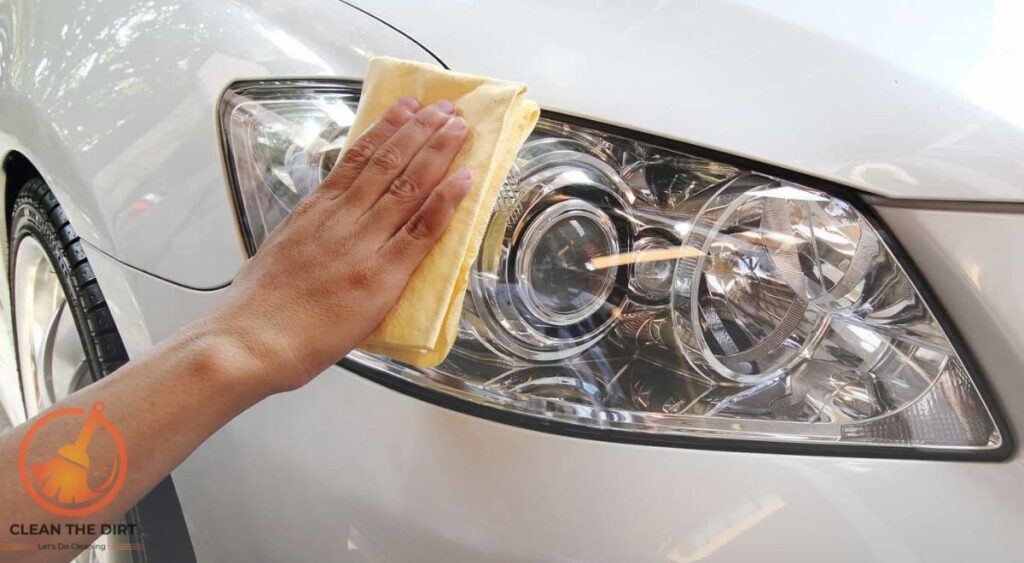
- After letting the WD40 sit for a few minutes, use a clean microfiber cloth or soft towel to wipe away the product from the headlight lens. You should notice a significant improvement in clarity and shine as you remove the residue.
Step 5: Repeat if Necessary
- Depending on the condition of your headlights, you may need to repeat the process for optimal results. If there are still areas of stubborn oxidation or grime remaining, simply reapply WD40 and repeat steps 2-4 until the desired level of clarity is achieved.
Step 6: Rinse and Dry
- Once you’re satisfied with the results, give the headlight lens a final rinse with water to remove any leftover WD40 residue.
- Use a clean, dry microfiber cloth or soft towel to dry the headlight lens thoroughly, ensuring a streak-free finish.
And there you have it, simple and effective steps of this guide on how to clean headlights with WD40. With just a few easy steps, you can say goodbye to dull, foggy headlights and hello to clear, bright beams that will illuminate the road ahead. So what are you waiting for? Grab your can of WD40 and let’s get started on transforming your headlights today with us.
Understanding Headlight Dullness
Before we act on this guide on how to clean headlights with WD40, let’s first understand why our headlights lose their shine in the first place. Imagine that you’re driving down a dimly lit road, relying on your headlights to guide the way, but instead of a clear beam cutting through the darkness, you’re met with a foggy glow that barely illuminates the path ahead. It will be frustrating for you.
Well, the reason behind this dimming effect is none other than headlight dullness. Over time, the clear plastic covering your headlights can undergo a process called oxidation, where exposure to sunlight, moisture, and environmental contaminants causes the surface to become cloudy or yellowed. This oxidation not only detracts from the appearance of your headlights but also diminishes their effectiveness in lighting up the road ahead.
But why does this matter? Well, besides the obvious aesthetic concerns, dull headlights can pose serious safety risks. Reduced visibility due to cloudy or yellowed lenses can significantly impair your ability to see and be seen while driving, especially during nighttime or in adverse weather conditions. This not only increases the chances of accidents but also compromises the safety of you and your passengers.
So, the next time you notice your headlights looking less than stellar, don’t just brush it off as a cosmetic issue. Understanding the root cause of headlight dullness is the first step towards reclaiming clear, bright beams and ensuring a safer, more enjoyable driving experience. With the power of WD40 on your side, you’ll soon discover just how to clean headlights with WD40 easily and how you can restore brilliance to your headlights.
Safety Precautions
As we embark on our journey to discover how to clean headlights with WD40, it’s important to prioritize safety every step of the way. While the WD40 method is generally safe and straightforward, it’s always better to err on the side of caution to ensure a smooth and accident-free experience. Here are some essential safety precautions to keep in mind before you begin.
1. Protective Gear
Before you start cleaning your headlights, it’s a good idea to put on some protective gear, such as gloves and safety glasses. This will help shield your hands and eyes from any potential irritation or chemical exposure during the cleaning process.
2. Ventilation
While WD40 is generally safe to use in a well-ventilated area, it’s still a good idea to work in a space with adequate airflow to minimize exposure to fumes. If you’re working in a limited space, consider opening windows or doors to allow fresh air to circulate.
3. Avoid Contact with Paintwork
While WD40 is great for cleaning headlights, it’s not so great for your vehicle’s paintwork. To avoid accidentally damaging your car’s exterior, be careful not to overspray or allow WD40 to come into contact with painted surfaces. If needed, cover nearby areas with masking tape.
4. Mind the Surroundings
Before you start spraying WD40 onto your headlights, take a moment to assess your surroundings. Make sure there are no open flames or sources of heat nearby, as WD40 is flammable and should be used with caution around potential ignition sources.
5. Dispose of Waste Properly
Once you’ve finished cleaning your headlights, be sure to dispose of any used materials, such as microfiber cloths or paper towels, properly. Avoid leaving them lying around where they could pose a hazard or contribute to environmental pollution.
By following these simple safety precautions, you can enjoy a worry-free headlight cleaning experience and achieve fantastic results with the WD40 method. So gear up, stay safe, and let’s get ready to shine a light on how to clean headlights with WD40.
Tips for Optimal Results
As you embark on your headlight cleaning journey and explore the wonders of how to clean headlights with WD40, consider these handy tips to ensure you achieve the best possible results.
1. Use a Clean Cloth
Before applying WD40 to your headlights, make sure to use a clean, lint-free cloth or microfiber towel. This will help prevent any dirt or debris from scratching the surface of your headlights and ensure a smooth application of the product.
2. Work in Small Sections
To ensure thorough coverage and effective cleaning, work on one section of the headlight at a time. This will allow you to focus your efforts and ensure that no spots are missed during the application process.
3. Apply Multiple Layers if Necessary
If your headlights are heavily oxidized or dirty, don’t be afraid to apply multiple layers of WD40. Simply repeat the application process until you achieve the desired level of clarity and shine.
4. Be Patient
Rome wasn’t built in a day, and neither are perfectly clean headlights. Allow the WD40 to work its magic by letting it sit on the headlights for a few minutes before wiping it away. This will give the product enough time to penetrate and dissolve stubborn grime and oxidation.
5. Buff for Extra Shine
Once you’ve wiped away the WD40 residue, consider buffing the headlights with a clean, dry cloth to enhance their shine even further. This will help remove any remaining residue and leave behind a glossy, polished finish.
6. Follow Up with Protection
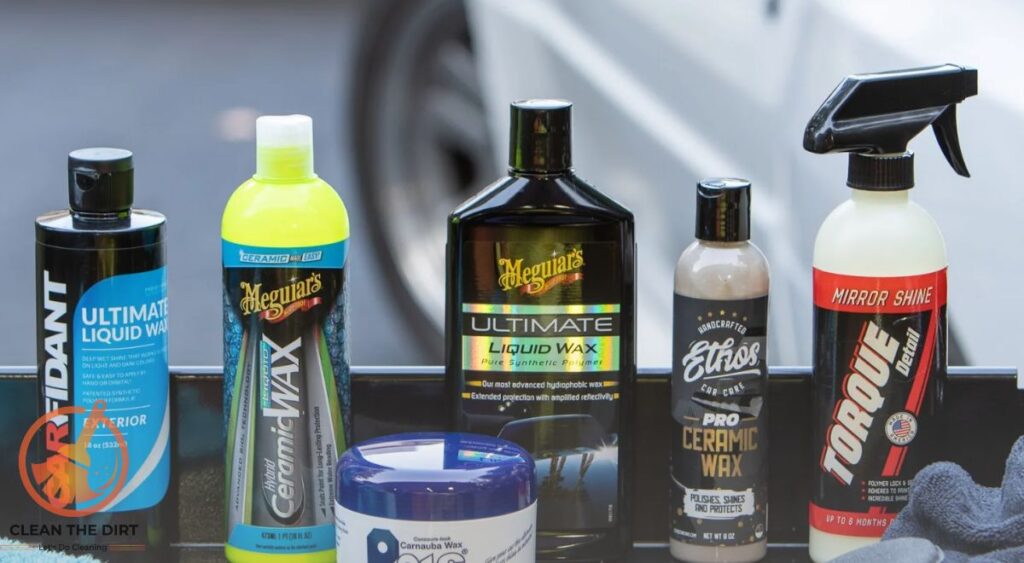
To prolong the clarity and shine of your headlights, consider applying a protective sealant or wax after cleaning. This will help repel dirt and grime and provide an extra layer of defense against future oxidation.
7. Regular Maintenance is Key
Finally, remember that maintaining clear headlights is an ongoing process. Make it a habit to inspect your headlights regularly and touch them up as needed to ensure they stay looking their best for years to come.
By following these simple tips, you can unlock the full potential of how to clean headlights with WD40 and enjoy clear, bright beams that illuminate the road ahead. So grab your supplies, put on some tunes, and get ready to shine a light on safer, brighter travels.
Benefits of WD40 Headlight Cleaning
When it comes to headlight cleaning, the WD40 method offers a multitude of benefits that make it a standout choice for drivers looking to restore clarity and shine to their headlights. Let’s explore some of the key advantages of the process of how to clean headlights with WD40.
1. Efficiency
One of the biggest benefits of using WD40 for headlight cleaning is its efficiency. WD40’s powerful formula is specifically designed to penetrate and dissolve oxidation, dirt, and grime, making it easier to achieve clear, bright headlights in a fraction of the time compared to other methods.
2. Versatility
WD40 is not just a one-trick pony, it’s a versatile product with a wide range of applications. In addition to cleaning headlights, WD40 can be used for everything from lubricating hinges to loosening rusty bolts, making it a handy addition to any DIY lover toolkit.
3. Cost-Effectiveness
Compared to professional detailing services or specialized headlight restoration kits, the WD40 method is incredibly cost-effective. With just a can of WD40 and a few basic supplies, you can achieve professional-quality results at a fraction of the cost, saving you both time and money in the long run.
4. Convenience
Another major advantage of the WD40 method is its convenience. Unlike other headlight cleaning methods that may require specialized tools or equipment, the WD40 method can be done right in your own driveway with minimal debate. Plus, there’s no need to wait for appointments or deal with lengthy drying times, simply spray, wipe, and go.
5. Long-lasting Results
With proper care and maintenance, the results of WD40 headlight cleaning can last for months, if not years. By following up with regular inspections and touch-ups as needed, you can enjoy clear, bright headlights that enhance both the appearance and safety of your vehicle for the long haul.
6. Safety
Last but certainly not least, clear headlights are essential for safe driving, especially at night or in adverse weather conditions. By restoring clarity and brightness to your headlights with WD40, you’re not just improving the aesthetics of your vehicle, you’re also prioritizing the safety of yourself and your passengers on the road.
In conclusion, the benefits of this guide on how to clean headlights with WD40 are clear, it’s efficient, versatile, cost-effective, convenient, and, most importantly, safe. So why wait? Grab your can of WD40 and get ready to unlock the shine of your headlights today.
Conclusion
We’ve reached the end of our journey exploring the wonders of how to clean headlights with WD40. Throughout this guide, we’ve learned how to transform dull, foggy headlights into clear, bright beams that illuminate the road ahead. But before we part ways, let’s recap some key takeaways.
- Safety First: When it comes to headlight cleaning, safety should always be your top priority. Remember to wear protective gear, work in a well-ventilated area, and follow all safety precautions outlined in this guide to ensure a smooth and accident-free cleaning experience.
- Preparation is Key: Before diving into the cleaning process, take the time to gather your materials and prepare your headlights for treatment. This will help ensure optimal results and minimize the risk of damage to your vehicle’s paintwork or surrounding areas.
- Follow the Steps: The WD40 method for headlight cleaning is straightforward, but it’s important to follow each step carefully for the best results. From applying WD40 to wiping away residue, every step plays a crucial role in restoring clarity and shine to your headlights.
- Maintenance Matters: Once your headlights are clean and clear, don’t forget to follow up with regular maintenance to keep them looking their best. By inspecting and touching up your headlights as needed, you can prolong the effects of the cleaning process and enjoy safer, brighter travels on the road.
- Enjoy the Benefits: With clear, bright headlights, you’ll not only enhance the appearance of your vehicle but also prioritize the safety of yourself and your passengers on the road. So take pride in your newly restored headlights and enjoy the benefits of improved visibility and peace of mind behind the wheel.
Let’s have a look at the below table indicates the methods for headlight cleaning and their outcomes.
| Method | Cost | Convenience | Effectiveness | Safety | Longevity | Eco-Friendliness |
|---|---|---|---|---|---|---|
| WD40 | Low | High | High | Moderate | Medium | Yes |
| Headlight Kits | Medium | Medium | High | High | High | Depends |
| Home Remedies | Low | Low | Medium | Low | Low | Yes |
| Professional | High | Low | High | High | High | Depends |
As you embark on your headlight cleaning journey, remember that you’re not just cleaning headlights, you’re unlocking the brilliance of your vehicle and taking proactive steps to ensure safer, brighter travels on the road. So take your can of WD40, roll up your sleeves, and get ready to shine a light on how to clean headlights with WD40. Safe travels, and happy cleaning.
Frequently Asked Questions (FAQs)
Is it safe to use WD40 on headlights?
Yes, WD40 is generally safe to use on headlights. Its formula is designed to penetrate and dissolve oxidation, dirt, and grime without causing damage to the headlight lens. However, it’s important to follow safety precautions and avoid contact with surrounding paintwork.
Will WD40 damage my car’s paintwork?
When used properly, WD40 should not damage your car’s paintwork. However, it’s important to avoid overspray and take precautions to protect surrounding areas from contact with the product. Using masking tape or a protective barrier can help prevent accidental damage.
How often should I clean my headlights with WD40?
The frequency of headlight cleaning with WD40 depends on various factors such as driving conditions, weather exposure, and the level of oxidation or grime buildup. Generally, it’s recommended to inspect your headlights regularly and clean them as needed to maintain clarity and visibility.
Can WD40 remove scratches from headlights?
While WD40 is effective at removing oxidation and dirt from headlights, it may not be able to remove deep scratches or physical damage to the headlight lens. In cases of severe scratches or damage, it’s best to consult a professional for repair or replacement options.
Do I need to rinse off WD40 after cleaning headlights?
Yes, it’s recommended to rinse off WD40 residue after cleaning headlights to remove any leftover product and prevent streaking or buildup. Use water and a clean cloth or towel to thoroughly rinse and dry the headlight lens for best results.
Can I use WD40 to clean other parts of my car?
Yes, WD40 is a versatile product that can be used for various automotive maintenance tasks, such as lubricating hinges, loosening rusted bolts, and removing tar or adhesive residue. However, always refer to the manufacturer’s instructions and use caution when applying WD40 to sensitive areas.
Will cleaning headlights with WD40 improve visibility at night?
Yes, cleaning headlights with WD40 can improve visibility at night by removing oxidation and grime that can cause dimming or yellowing of the headlight lens. Clear, bright headlights are essential for safe driving, especially in low-light conditions or adverse weather.
You May Also Like: How to Clean Yellow Headlights at Home? Complete DIY Guide

