Table of Contents
Introduction
Here is the comprehensive guide on how to clean Litter Robot 3. If you are a pet owner, you understand the importance of maintaining a clean environment for both you and your pet friend. The Litter Robot 3 is a revolutionary self-cleaning litter box designed to make your life easier by automating the dirty work, but even the most advanced technology requires regular care and consideration to guarantee optimal performance.
Imagine coming home to a fresh-smelling house with a clean litter box awaiting your pet’s next visit. With our comprehensive cleaning guide, you’ll learn how to clean Litter Robot 3 effectively, keeping your pet’s space tidy and odor-free.
Whether you’re an old litter robot owner or new to the world of automated litter boxes, this guide is here to help you master the art of maintenance. From simple steps to expert tips, we’ll walk you through everything you need to know about how to clean Litter Robot 3 to keep it in top-notch condition.
So, let’s roll up our sleeves and dive into the wonderful world of cleaning Litter Robot 3, ensuring a clean and comfortable environment for both you and your beloved pet.
Overview of the Litter Robot 3
Before we dive into the details of how to clean Litter Robot 3, let’s take a moment to understand what makes this creative litter box a game-changer for pet owners everywhere.
The Litter Robot 3 is not your average litter box. It’s a wonder of modern technology designed to simplify the task of pet waste management. With its automated self-cleaning mechanism, the Litter Robot 3 takes the hassle out of scooping and ensures a consistently clean litter bed for your pet companion.
At the heart of the Litter Robot 3 is its ingenious design, featuring a rotating globe that filters through the litter, separating clumps from clean litter and depositing waste into a convenient drawer below. This means no more daily scooping or messy litter trays to contend with, just set it and forget it.
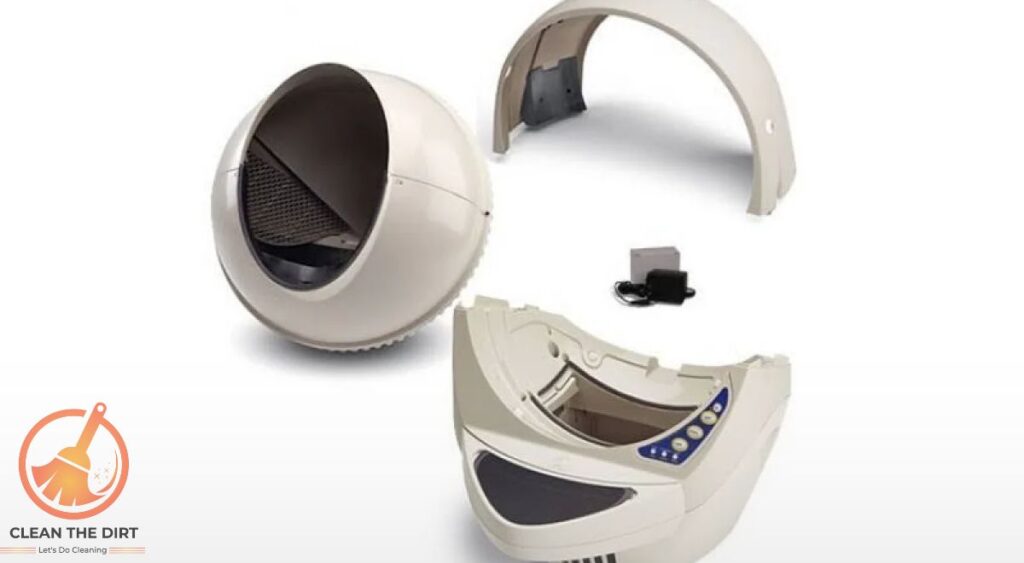
With its spacious interior and accommodating design, the Litter Robot 3 provides ample room for even the largest of cats to do their work comfortably. Its sleek and modern appearance blends seamlessly into any home decor, making it a stylish addition to your pet care routine.
But like any appliance, regular maintenance is key to ensuring optimal performance and longevity. That’s where our guide on how to clean Litter Robot 3 comes in. By following our step-by-step instructions and expert tips, you can keep your Litter Robot 3 running smoothly and your pet’s space clean and hygienic.
So, whether you’re a proud owner of a Litter Robot 3 or considering making the switch to automated litter box technology, rest assured that keeping it clean is straightforward with our helpful guide on how to clean Litter Robot 3. Let’s dive into the cleaning process and discover how simple it is to keep both you and your pet in an odor-free, fresh environment.
Why Cleaning Litter Robot 3 is Important?
You might be wondering, why all the controversy about cleaning Litter Robot 3. After all, it’s designed to automate the dirty work of pet waste management. However, regular cleaning is crucial to ensure that your Litter Robot 3 continues to function efficiently and effectively. Let’s explore some reasons for this guide on how to clean Litter Robot 3.
First and foremost, cleaning your Litter Robot 3 helps to maintain a clean and hygienic environment for your pet. Just like humans, cats prefer a clean and odor-free space to do their business. A dirty litter box can deter your pet from using it, leading to accidents around the house and unnecessary stress for both you and your pet.
Moreover, regular cleaning helps to prevent the buildup of odor-causing bacteria and ammonia fumes, which can be harmful to your pet’s health and well-being. By removing waste promptly and cleaning the litter box regularly, you can ensure a fresh-smelling home and a happy, healthy pet.
In addition to the health benefits, cleaning Litter Robot 3 also helps to prolong its lifespan and maintain its optimal performance. Over time, residue and debris can accumulate inside the litter box, potentially causing mechanical issues or malfunctions. By cleaning your Litter Robot 3 regularly, you can prevent these problems and enjoy uninterrupted use of this innovative pet care device.
So, while learning how to clean Litter Robot 3 may seem like a duty, it is an essential part of responsible pet ownership. By taking the time to maintain your Litter Robot 3, you’re not only ensuring a clean and comfortable environment for your pet but also extending the life of this valuable investment. As a cat owner or cat lover you should also pay attention to cleaning cat eye boogers and cleaning cat ears to ensure your cat’s perfect health and hygiene which your cat deserves. Ready to follow the steps and get started? Let’s dive into our step-by-step cleaning guide and discover just how easy it is to keep your Litter Robot 3 in perfect condition.
How to Clean Litter Robot 3? A Step-by-Step Cleaning Guide
Cleaning your Litter Robot 3 doesn’t have to be a daunting task. With our easy-to-follow how to clean Litter Robot 3 guide, you’ll be able to breeze through the process and keep your pet’s space clean and fresh.
Step 1: Preparation
Before you begin cleaning your Litter Robot 3, gather all the necessary supplies. You’ll need a scoop or shovel for removing waste, a pet-safe cleaning solution or mild detergent, a sponge or cloth for wiping down surfaces, and fresh litter for refilling the litter bed.
Step 2: Emptying the Waste Drawer
Start by unplugging your Litter Robot 3 from the power source and removing the waste drawer. Dispose of the waste in a trash bag or flush it down the toilet if your municipality allows it. Thoroughly rinse the waste drawer with warm water and mild detergent to remove any residue.
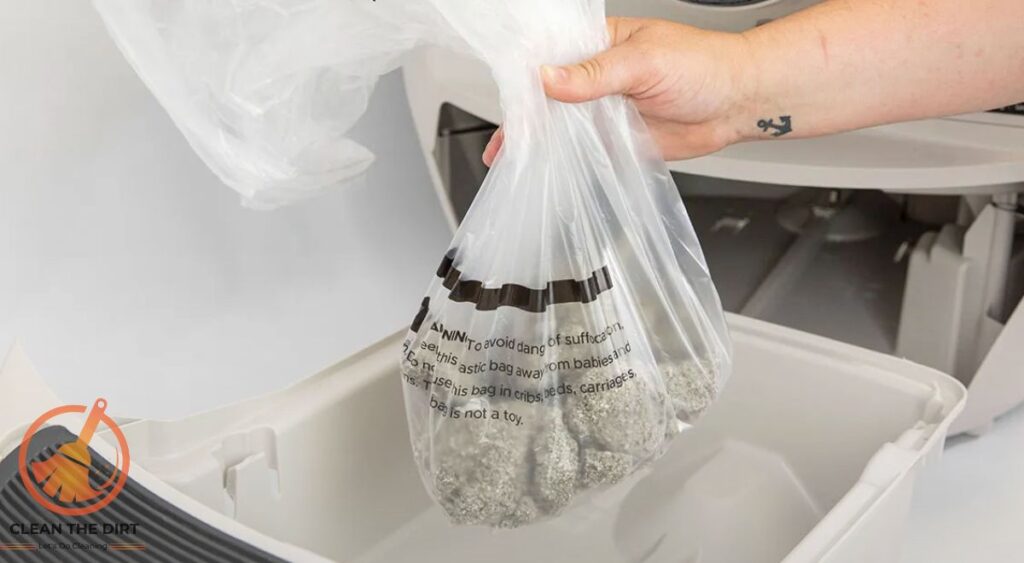
Step 3: Cleaning the Globe and Base
Next, focus on cleaning the globe and base of your Litter Robot 3. Use a damp cloth or sponge to wipe down the interior and exterior surfaces, paying special attention to areas where waste may have accumulated. For stubborn stains or odors, you can use a pet-safe cleaning solution diluted in water.
Step 4: Wiping Down the Sensors and Exterior
Take a moment to wipe down the sensors and exterior of your Litter Robot 3 with a clean, damp cloth. Dust and debris can accumulate on these surfaces over time, affecting the device’s performance. Be sure to dry the sensors thoroughly to prevent moisture buildup.
Step 5: Refilling Litter and Reassembling
Once you’ve finished cleaning, it’s time to refill the litter bed with fresh litter. Follow the manufacturer’s recommendations for the appropriate litter type and amount. Once the litter bed is filled, reassemble your Litter Robot 3, making sure all components are properly aligned and secured.
By following these simple steps in this guide on how to clean Litter Robot 3, you can ensure a hygienic environment for your pet and effortless maintenance of this creative pet care device.
Tips for Effective Cleaning
Cleaning your Litter Robot 3 can be a breeze with the right approach. To ensure thorough and efficient cleaning, consider implementing these helpful tips in this guide on how to clean Litter Robot 3.
Tip 1: Use Pet-Safe Cleaning Products
When cleaning your Litter Robot 3, opt for pet-safe cleaning products or mild detergents that are free of harsh chemicals or fragrances. These gentle cleaners will effectively remove dirt and odor without posing any risk to your pet’s health or safety.
Tip 2: Clean Regularly to Prevent Odors
To keep your Litter Robot 3 smelling fresh and clean, make it a habit to clean it regularly. Empty the waste drawer and wipe down the interior and exterior surfaces at least once a week, or more frequently if you have multiple pets or heavy usage.
Tip 3: Inspect for any Damage
Periodically inspect your Litter Robot 3 for any signs of damage, such as frayed cords or cracked components. Addressing these issues promptly can prevent more serious problems down the line and ensure the continued functionality of your device.
Tip 4: Maintain a Clean Environment
In addition to cleaning your Litter Robot 3, it’s important to maintain a clean environment around the litter box. Sweep or vacuum the area regularly to remove litter dust and debris, and consider placing a mat underneath the litter box to catch any stray litter.
Tip 5: Follow Manufacturer’s Guidelines
Lastly, always follow the manufacturer’s guidelines and recommendations when cleaning your Litter Robot 3. These instructions are designed to help you maintain the device properly and ensure its optimal performance and longevity.
By incorporating these tips into your Litter Robot 3 cleaning routine, you can keep your pet’s space clean and hygienic while extending the life of your Litter Robot 3. With a little effort and regular maintenance mentioned in this guide on how to clean Litter Robot 3, you can enjoy a fresh-smelling home and a happy, healthy pet.
Troubleshooting Common Issues
Encountering issues with your Litter Robot 3 can be frustrating, but fear not, we’re here to help troubleshoot some of the most common problems you may face when acting on this guide on how to clean Litter Robot 3.
Issue 1: Litter Clumping in the Globe
If you notice litter clumping in the globe of your Litter Robot 3, it may be due to several factors. One possible cause is using clumping litter that is too fine or dusty, causing it to stick together and form clumps. To fix this issue, try switching to a coarser litter or adding a litter mat to the entrance of the litter box to catch excess litter before it enters the globe.
Issue 2: Unusual Odors
Persistent odors originating from your Litter Robot 3 may indicate a buildup of bacteria or residue inside the device. To address this issue, thoroughly clean the interior and exterior surfaces of your Litter Robot 3 using a pet-safe cleaning solution or mild detergent. Be sure to also empty the waste drawer regularly and replace the litter as needed to keep odors at bay.
Issue 3: Sensor Malfunctions
If your Litter Robot 3 is experiencing sensor malfunctions, such as failing to detect when your pet enters or exits the litter box, there are a few troubleshooting steps you can try. Start by checking for any obstructions or debris around the sensors, as these can interfere with their functionality. Additionally, ensure that the sensors are clean and free of dust or dirt buildup, as this can affect their ability to detect motion accurately.
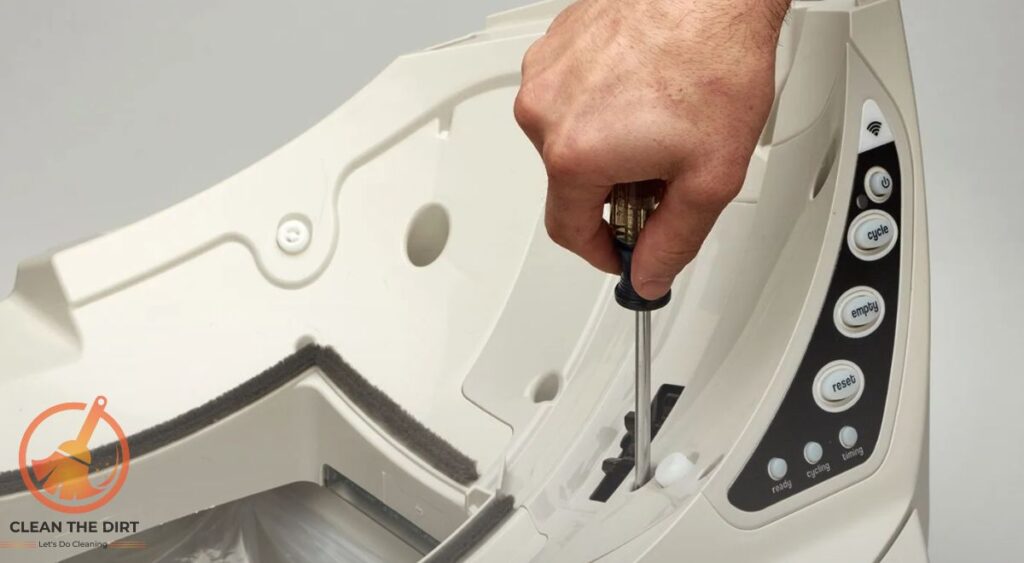
By addressing these common issues and following our expert tips in this guide on how to clean Litter Robot 3, you can keep your pet’s space clean and hygienic while ensuring the continued functionality of your Litter Robot 3. If you continue to experience problems despite troubleshooting, don’t hesitate to reach out to the manufacturer for further assistance.
Conclusion
Congratulations on completing our comprehensive guide on how to clean Litter Robot 3. We hope you’ve found the information helpful and informative, empowering you to maintain a clean and hygienic environment for your beloved pet.
Although cleaning your Litter Robot 3 may seem like an effort, it’s a necessary component of caring for a pet responsibly. Through attention to our comprehensive cleaning guide and the use of our knowledgeable advice, you can guarantee that your Litter Robot 3 stays in excellent shape, giving your pet a hygienic and pleasant area to relieve themselves.
Remember, regular cleaning is key to preventing odors, maintaining optimal performance, and prolonging the lifespan of your Litter Robot 3. With a little effort and consistency, you can enjoy a fresh-smelling home and a happy, healthy pet for years to come.
Also, remember along with cleaning your pet’s devices, you need to take care of their health and hygiene. Like if you have a dog, you should care about cleaning your dog’s ears and cleaning your dog’s stomach naturally if you are a true pet lover and want to make your pet healthy and energetic from every side.
We hope this guide has equipped you with the knowledge and confidence you need to tackle cleaning Litter Robot 3 like a pro. If you have any questions or concerns, don’t hesitate to reach out to the manufacturer or consult our additional resources for further assistance.
In the following comparison table, we’ll explore the key differences between the Litter Robot 3 and traditional litter boxes. From automated cleaning processes to odor control and long-term costs, discover which option offers the convenience and efficiency you need to keep your pet’s litter area clean and your home smelling fresh.
| Aspect | Litter Robot 3 | Traditional Litter Box |
|---|---|---|
| Cleaning Process | Automated self-cleaning mechanism | Manual scooping and cleaning required |
| Odor Control | Excellent odor control with waste containment | Odor control varies; may require frequent cleaning |
| Maintenance | Periodic cleaning and maintenance required | Daily cleaning and litter replacement necessary |
| Convenience | Convenient and hassle-free operation | Requires more frequent attention and effort |
| Space Requirements | Requires space for the unit and power source | Daily cleaning and litter replacements are necessary |
| Suitability for Multiple Cats | Suitable for multiple cats with proper management | May require multiple boxes for multiple cats |
| Long-Term Cost | Higher initial investment; lower long-term cost | Lower initial cost; ongoing expense for litter |
| Reliability | Known for reliability and durability | Reliability may vary depending on the brand |
Thank you for joining us on this journey in which you learn how to clean Litter Robot 3. Here’s to many more years of hassle-free maintenance and a happy, purring pet by your side.
Frequently Asked Questions (FAQs) For How to Clean Litter Robot 3?
How often should I clean my Litter Robot 3?
It’s recommended to clean your Litter Robot 3 at least once a week to prevent odors and maintain optimal performance. However, you may need to clean it more frequently if you have multiple pets or heavy usage.
Can I use any type of litter with the Litter Robot 3?
The Litter Robot 3 is compatible with most clumping litters, but it’s best to use high-quality, low-dust litter for optimal results. Avoid using non-clumping or silica gel litter, as these may not work effectively with the Litter Robot 3’s self-cleaning mechanism.
Do I need to replace any parts of the Litter Robot 3 over time?
While the Litter Robot 3 is designed to be durable and long-lasting, some parts may need to be replaced periodically due to normal wear and tear. Components such as the waste drawer liners and carbon filters should be replaced as needed to maintain the device’s functionality.
How can I prevent litter tracking around the Litter Robot 3?
Placing a litter mat underneath or around the Litter Robot 3 can help prevent litter tracking by capturing stray litter before it spreads. Additionally, regularly sweeping or vacuuming the area around the litter box can help to keep it clean and tidy.
My Litter Robot 3 is emitting a strange odor. What should I do?
If your Litter Robot 3 is emitting an unusual odor, it may indicate a buildup of bacteria or residue inside the device. Try cleaning the interior and exterior surfaces of the Litter Robot 3 thoroughly using a pet-safe cleaning solution or mild detergent. Be sure to also empty the waste drawer and replace the litter as needed to eliminate odors.
You May Also Like: How to Clean Cat Eye Boogers? Mastering Cat’s Eye Care


