Table of Contents
Introduction
Have you ever noticed the lovely sight of birds flocking to your backyard feeder, their colorful feathers brightening up your day? Bird feeders are not just a source of joy for bird lovers, they also play a crucial role in supporting local bird populations. However, this guide on how to clean bird feeders is often overlooked amidst the excitement of birdwatching.
In this comprehensive guide, we’ll dive into the importance of cleaning bird feeders and provide you with practical tips to ensure a healthy and inviting feeding station for our bird friends. From scrubbing away stubborn grime to understanding the frequency of cleaning, we’ve got you covered.
So, grab your gloves, and let’s embark on this journey of learning how to clean bird feeders and be ready to discover the secrets of maintaining a new bird shelter right in your backyard.
Why Clean Bird Feeders?
You might wonder, why trouble with the annoyance of cleaning bird feeders when they’re simply serving as a buffet for our birds? As it happens, it appears that regular maintenance of your bird feeders is not just a task, it’s a crucial aspect of responsible bird feeding. Let’s explore why this guide on how to clean bird feeders.
1. Preventing Disease Spread
Just like us, birds are susceptible to illnesses. Dirty bird feeders can become breeding grounds for harmful bacteria, fungi, and parasites that can endanger the health of visiting birds. By cleaning bird feeders regularly, you can minimize the risk of disease transmission and ensure a safe feeding environment.
2. Protecting Bird Health
Birds rely on feeders as a supplemental food source, especially during harsh weather conditions or times of scarcity. A clean feeder means clean food, reducing the likelihood of birds ingesting moldy or contaminated seeds. By maintaining a hygienic feeding station, you’re safeguarding the health and well-being of your birds.
3. Attracting a Variety of Birds
Cleanliness is key to attracting a diverse range of bird species to your backyard. Many birds are selective feeders and may avoid feeders that appear dirty or messy. By regularly cleaning bird feeders and keeping them in top condition, you’ll invite a colorful array of feathered guests to your yard, enhancing your birdwatching experience.

4. Longevity of Feeders
Neglected feeders are more prone to damage and deterioration. Accumulated grime and moisture can cause corrosion, mold growth, and structural weakening, leading to feeder malfunction or even collapse. By incorporating regular cleaning of bird feeders into your routine, you’ll extend the lifespan of your feeders, saving you money in the long run.
In essence, this guide on how to clean bird feeders isn’t just about beauty, it’s about fostering a healthy and inviting environment for our bird companions. So, roll up your sleeves and join us as we dive deeper into the art of bird feeder maintenance. In addition to cleaning bird feeders, you should also clean the other pet-related things, such as cleaning the boogers in your cat’s eyes to preserve cleanliness and health and cleaning your dog’s stomach to prevent any big disease.
Materials Needed for Cleaning Bird Feeders
Now that you understand the importance of learning how to clean bird feeders, let’s gather the essential materials to get started. Don’t worry, you won’t need anything fancy, just a few basic supplies to ensure a thorough and effective cleaning process. The list of items you’ll need is here.
1. Cleaning Solution
Choose a mild detergent or dish soap to break down grease, grime, and bacteria. Avoid using harsh chemicals or bleach, as they can be harmful to both birds and the environment. Opt for eco-friendly options whenever possible.
2. Brushes
Invest in a set of sturdy brushes with long handles to reach into every detail of your bird feeders. A bottle brush or pipe cleaner works well for scrubbing feeder tubes, while a small scrub brush or toothbrush is ideal for intricate parts.
3. Water Source
You’ll need access to clean, running water for rinsing off soap residue and dirt from your feeders. If you’re cleaning feeders outdoors, a garden hose or outdoor tap will be enough. For indoor cleaning, a sink with a detachable spray nozzle is convenient.
4. Bucket or Basin
Use a bucket or basin to mix your cleaning solution and soak smaller feeder components. This will help loosen stubborn debris and make scrubbing more effective. Choose a container large enough to accommodate your feeders comfortably.
5. Gloves
Protect your hands from exposure to dirt, bacteria, and potential allergens by wearing a pair of rubber or latex gloves. Not only will gloves keep your hands clean, but they’ll also provide a better grip when handling slippery feeder parts.
6. Towels or Rags
Keep a supply of clean towels or rags handy for drying off wet feeders after cleaning. Absorbent materials like microfiber cloths work well for removing moisture without leaving lint or residue behind.
7. Vinegar Solution (Optional)
If you prefer a natural cleaning alternative, consider using a solution of vinegar and water. Vinegar acts as a mild disinfectant and helps dissolve mineral deposits, leaving your feeders sparkling clean.
With these basic materials at your disposal, you have all you need to learn how to clean bird feeders with ease and efficiency. Now, let’s roll up our sleeves and dive into the cleaning process.
How to Clean Bird Feeders? A Step-by-Step Cleaning Process
Now that you’ve gathered your materials, it’s time to learn how to clean bird feeders. Follow these simple steps to ensure your birds have a clean and safe feeding environment.
1. Disassemble the Feeder
Start by carefully disassembling the bird feeder, and removing any removable parts such as perches, trays, and lids. This will make the cleaning process more manageable and allow you to access all areas of the feeder.
2. Dispose of Old Seeds
Empty any remaining seeds or debris from the feeder into a compost bin or garbage bag. Discard any moldy or spoiled seeds to prevent potential contamination of fresh food.
3. Soak in Soapy Water
Fill a bucket or basin with warm water and add a small amount of mild detergent or dish soap. Place the feeder components in the soapy water and allow them to soak for a few minutes. This will help loosen dirt, grime, and residue.
4. Scrub Thoroughly
Using a brush or scrubber, thoroughly scrub all surfaces of the feeder, including the inside walls, feeding ports, and crevices. Pay special attention to areas where dirt and debris tend to accumulate, such as around the feeding holes and seams.
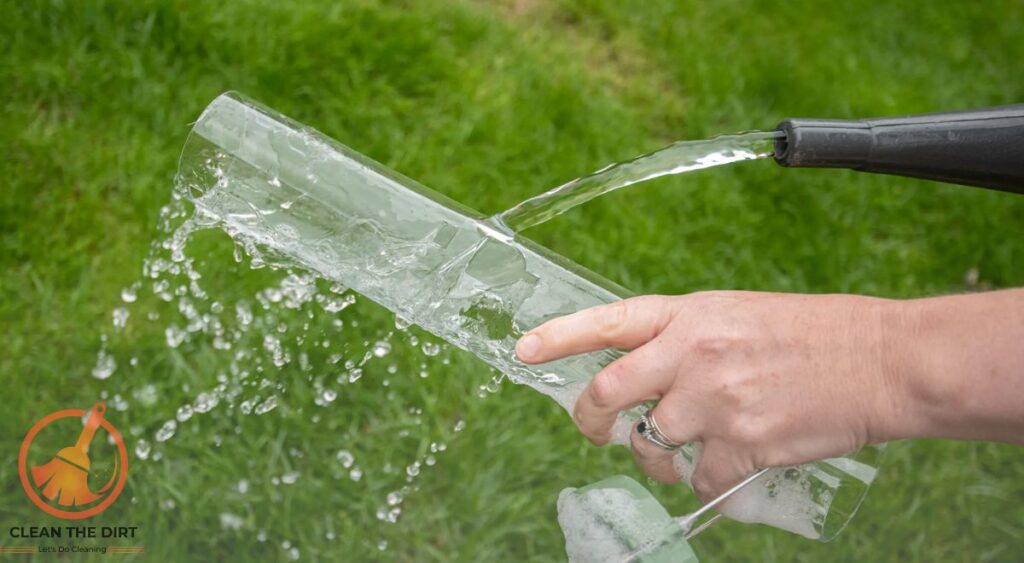
5. Rinse with Clean Water
Once the feeder is scrubbed clean, rinse it thoroughly with clean, running water to remove any soap residue and dirt. Use a hose, sink sprayer, or bucket of water to ensure all traces of soap are washed away.
6. Dry Completely
After rinsing, shake off any excess water and use a clean towel or rag to dry the feeder thoroughly. Pay attention to hard-to-reach areas and ensure that no moisture remains, as dampness can promote mold growth and corrosion.
7. Reassemble and Refill
Once the feeder is completely dry, reassemble the components according to the manufacturer’s instructions. Fill the feeder with fresh bird seed and hang it in its designated location, ready to welcome hungry birds.
8. Regular Maintenance
Make cleaning bird feeders a regular part of your bird-feeding routine. Aim to clean your feeders at least once every two weeks, or more frequently if you notice signs of mold, mildew, or dirt buildup.
By following the steps mentioned above in this guide on how to clean bird feeders, you’ll keep your bird feeders clean and inviting for your feathered friends, ensuring they have a safe and healthy dining experience in your backyard shelter.
How Often Should You Clean Bird Feeders? Finding the Right Balance
You now know the importance of learning how to clean bird feeders to maintain a healthy feeding environment, but you might be wondering, “How often should I clean my bird feeders?” Numerous factors, including weather patterns, bird activity, and feeder design, influence how often a feeder needs to be cleaned. Let’s explore some guidelines to help you find the right balance.
1. Weather Conditions
In wet and humid climates, bird feeders are more prone to mold, mildew, and bacterial growth. Similarly, during periods of heavy rain or snow, feeders may become saturated with moisture, increasing the risk of contamination. In such conditions, it’s advisable to clean your feeders more frequently, ideally once a week or after every rainfall.
2. Bird Traffic
The number of birds visiting your feeders can also influence the frequency of cleaning. High bird traffic means more seeds consumed and more waste produced, leading to quicker contamination of feeders. If you have a bustling bird community frequenting your feeders, consider cleaning them more often to ensure cleanliness and hygiene.
3. Feeder Design
The design of your bird feeder can impact how quickly it becomes dirty. Open-platform feeders or tube feeders with large openings may accumulate debris more rapidly than enclosed or specialized feeders. Keep an eye on the condition of your feeders and adjust your cleaning schedule accordingly.
4. Seasonal Considerations
Seasonal changes can affect bird feeder cleanliness. For example, during the warmer months, bird feeders may be more susceptible to insect infestations, requiring more frequent cleaning to remove pests and their droppings. Conversely, in the winter, feeders may accumulate ice or snow, necessitating cleaning to prevent blockages and spoilage.
5. Observation and Inspection
Regular observation of your bird feeders is key to identifying signs of dirt, mold, or seed spoilage. Take a few moments each day to inspect your feeders for any visible contamination or unusual activity. If you notice any issues, such as moldy seeds or foul odors, it’s time to clean your bird feeders promptly.
In summary, there needs to be more than a one-size-fits-all answer to how often to clean bird feeders. It’s essential to assess your unique environmental conditions and bird feeder setup to determine an appropriate cleaning schedule. By staying vigilant and proactive with this guide on how to clean bird feeders, you can ensure that your feathered friends always have a clean and safe dining experience in your backyard paradise.
Tips for Effective Cleaning of Bird Feeders
Cleaning bird feeders may seem like a simple task, but a few extra tips can make the process more efficient and thorough. Here are some handy tips to ensure that this guide on how to clean bird feeders is as effective as possible.
1. Use Hot Water
Warm or hot water can help dissolve stubborn debris and grease more effectively than cold water. Before scrubbing your feeders, rinse them with hot water to loosen dirt and make cleaning easier.
2. Rotate Cleaning Brushes
Invest in a set of cleaning brushes with different sizes and shapes to handle various parts of your bird feeders. Rotating brushes ensures that you can reach into tight spaces and thoroughly scrub all surfaces.
3. Scrub Regularly
Don’t wait until your bird feeders are visibly dirty to clean them. Regular, routine cleaning prevents the buildup of mold, bacteria, and debris, keeping your feeders hygienic and safe for birds.
4. Disinfect with Vinegar
Vinegar is a natural disinfectant that can effectively kill bacteria and fungi. For an extra boost of cleanliness, mix equal parts vinegar and water and use this solution to soak and scrub your bird feeders.
5. Dry Completely
After cleaning, make sure to dry your bird feeders thoroughly before refilling them with fresh seeds. Moisture can promote mold growth and corrosion, so take the time to air-dry your feeders or use a clean towel to remove excess water.
6. Inspect Regularly
Take a close look at your bird feeders during cleaning to identify any signs of damage or wear. Check for loose screws, cracked plastic, or rusted metal parts, and repair or replace them as needed to ensure the longevity of your feeders.
7. Practice Regular Maintenance
In addition to cleaning, regular maintenance tasks such as tightening screws, lubricating moving parts, and replacing worn components can prolong the lifespan of your bird feeders and keep them functioning smoothly.
8. Keep Surrounding Area Clean
Birds are messy eaters, and spilled seeds can attract pests and promote the growth of mold and bacteria. Regularly clean up any spilled seeds or debris around your bird feeders to maintain a clean feeding area.
By incorporating the tips provided in this guide on how to clean bird feeders, you can ensure that your feathered friends have a safe and inviting living experience in your backyard.
Safety Considerations When Cleaning Bird Feeders
While this guide on how to clean bird feeders is essential for maintaining a healthy environment for backyard birds, it’s equally important to prioritize safety during the cleaning process. Here are a few things to consider regarding safety.
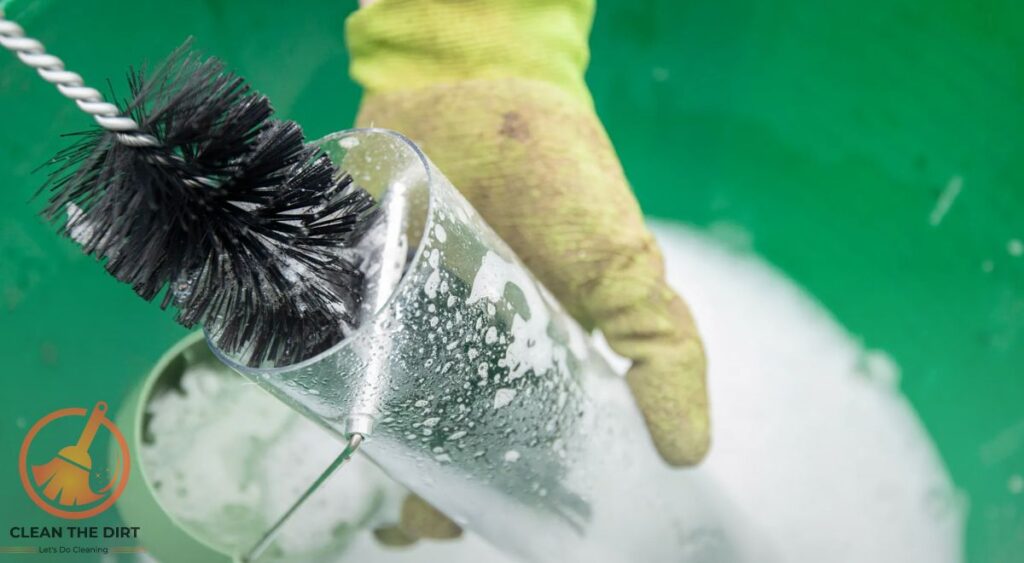
1. Wear Gloves
Protect your hands from potential exposure to dirt, bacteria, and allergens by wearing gloves while cleaning bird feeders. Choose gloves made of rubber or latex to provide a barrier between your skin and any contaminants present on the feeders.
2. Avoid Harsh Chemicals
When selecting cleaning products for your bird feeders, opt for mild detergents or dish soaps that are safe for both birds and the environment. Avoid using harsh chemicals or bleach, as these substances can be harmful if ingested by birds or leach into the surrounding environment.
3. Rinse Thoroughly
After cleaning your bird feeders with soap and water, be sure to rinse them thoroughly with clean, running water. This helps remove any lingering soap residue and ensures that no harmful chemicals remain on the feeders.
4. Handle with Care
When disassembling and reassembling bird feeders for cleaning, handle the components with care to avoid causing damage or injury. Watch out for sharp edges or sticking-out parts that could pose a risk of cuts or scratches.
5. Dispose of Waste Responsibly
Properly dispose of any spoiled seeds, debris, or cleaning waste generated during the cleaning bird feeders process. If disposing of seeds, consider composting them if they’re free from mold or contamination. Dispose of cleaning waste according to local regulations and guidelines.
6. Clean in Well-Ventilated Areas
When cleaning bird feeders indoors, ensure that you’re working in a well-ventilated area to minimize exposure to cleaning fumes and airborne particles. Open windows or use fans to improve air circulation and reduce the risk of inhaling potentially harmful substances.
7. Keep Pets Away
While cleaning bird feeders, keep pets such as cats and dogs away from the area to prevent them from coming into contact with cleaning chemicals or potentially contaminated surfaces. Ensure that cleaning products are stored securely out of reach of curious pets.
8. Monitor for Adverse Reactions
If you experience any adverse reactions, such as skin irritation or respiratory discomfort, while cleaning bird feeders, stop the cleaning process immediately and seek medical attention if necessary. Take precautions to avoid further exposure to potentially harmful substances.
By following these safety considerations given in this guide on how to clean bird feeders, you can ensure that cleaning bird feeders remains a safe and enjoyable activity for both you and your feathered friends.
Conclusion
Congratulations on completing this journey on how to clean bird feeders. We’ve covered a lot of ground, from understanding the importance of maintaining a clean feeding environment to learning practical tips for effective cleaning.
By now, you understand that learning how to clean bird feeders isn’t just a task, it’s a crucial aspect of responsible bird feeding. Regular cleaning helps prevent the spread of disease, protects the health of visiting birds, and ensures a welcoming environment for our bird friends.
Apart from cleaning bird feeders, you should also clean your other household items as well like cleaning gas stove top grates to ensure their longevity and cleaning rust off Blackstone to prevent any big damage or loss.
As you embark on your bird feeder cleaning adventures, remember to prioritize safety by wearing gloves, using mild cleaning products, and handling components with care. Take the time to thoroughly clean and inspect your feeders regularly, and you’ll be rewarded with the delightful sight of happy and healthy birds visiting your backyard.
The following table compares bird feeder cleaning methods, highlighting their pros and cons. From hand scrubbing to soaking and natural disinfectants, each approach offers benefits. Consider factors like time, effort, and feeder type when selecting the best method to keep your backyard bird-friendly and healthy.
| Cleaning Method | Pros | Cons |
|---|---|---|
| Hand Scrubbing | Effective for removing stubborn debris and stains | Requires more time and effort compared to other methods |
| Soaking in Soapy Water | Helps loosen dirt and grime for easier scrubbing | Requires additional time for soaking and drying |
| Vinegar Solution | Natural disinfectant that kills bacteria and fungi | May leave a vinegar scent if not rinsed thoroughly |
| Bleach Solution | Kills bacteria, viruses, and fungi effectively | Harsh chemical that requires careful handling and thorough rinsing |
| Dishwasher Cleaning | Convenient option for cleaning removable feeder parts | Not suitable for all feeder types and materials; may cause damage |
Thank you for joining us in this journey of learning how to clean bird feeders, and we hope you feel empowered to maintain a clean and inviting feeding station for your feathered companions. Here’s to many more joyful moments of birdwatching and bird feeding ahead.
Frequently Asked Questions (FAQs) for How to Clean Bird Feeders?
How often should I clean my bird feeders?
It’s recommended to clean bird feeders at least once every two weeks. However, factors such as weather conditions, bird traffic, and feeder design may influence cleaning frequency. Regular observation of your feeders will help determine the appropriate cleaning schedule.
What is the best way to clean bird feeders?
The best way to clean bird feeders is to disassemble them, remove any leftover seeds or debris, soak the components in warm, soapy water, scrub thoroughly with a brush, rinse with clean water, and dry completely before reassembling and refilling.
Can I use bleach to clean bird feeders?
It’s not recommended to use bleach or harsh chemicals to clean bird feeders, as these substances can be harmful to birds and the environment. Instead, opt for mild detergents or dish soaps that are safe for use around wildlife.
How do I prevent mold from growing in my bird feeders?
To prevent mold growth, clean bird feeders regularly and ensure that they are completely dry before refilling with fresh seeds. Additionally, avoid using moist or moldy seeds, and place feeders in well-ventilated areas away from excessive moisture.
What should I do if I notice sick or diseased birds at my feeders?
If you observe sick or diseased birds at your feeders, it’s essential to take precautions to prevent the spread of illness. Temporarily remove and clean your feeders, disinfect them with a vinegar solution, and avoid feeding birds until the issue is resolved. Contact local wildlife authorities or veterinarians for guidance on how to proceed.
Are there any safety considerations when cleaning bird feeders?
Yes, safety considerations when cleaning bird feeders include wearing gloves to protect your hands, avoiding harsh chemicals, rinsing thoroughly with clean water, handling components with care, disposing of waste responsibly, cleaning in well-ventilated areas, and keeping pets away from cleaning areas.
Can I attract more birds to my feeders by keeping them clean?
Yes, maintaining clean bird feeders can attract a greater variety of birds to your backyard. Many birds are selective feeders and may avoid dirty or contaminated feeders. By regularly cleaning and providing fresh seeds, you’ll create a welcoming environment for birds to visit.
You May Also Like: How to Clean Litter Robot 3? Expert Tips for Effectiveness


