Table of Contents
Introduction
Hello to every car lover. Have you ever noticed your once bright and clear headlights gradually taking on a yellowish hue? It’s like they’ve lost their sparkle, right? Well, fear not, because we’re here to guide you through the process of how to clean yellow headlights at home and bring back that showroom shine.
Just imagine that you’re moving down the road at night, relying on your headlights to light the way. But instead of crisp, white beams cutting through the darkness, you’re met with a dim, yellow glow. Not only does it detract from the overall look of your car, but it also raises concerns about visibility and safety. That’s where our handy guide on how to clean yellow headlights at home comes in to help you reclaim the brilliance of your headlights right from the comfort of your own driveway.
Now, you might be wondering, why headlights turn yellow in the first place. Well, it’s a combination of factors like oxidation, UV exposure, and general reasons. But fear not, because we’re about to dive into the science behind it and uncover the best methods for restoring your headlights to their former glory.
So grab your cleaning supplies and get ready to roll up your sleeves, because by the end of this guide, you’ll be well-equipped with the knowledge and know-how for how to clean yellow headlights at home like a pro. Let’s get started.
Assessing Your Headlights
Before diving into the cleaning process and learning how to clean yellow headlights at home, it’s essential to take a close look at the current condition of your headlights. Think of it as giving your headlights a quick check-up to diagnose any issues and determine the best course of action for restoration.
Start by parking your car in a well-lit area or using a flashlight to closely examine the surface of your headlights. Look for any signs of yellowing, cloudiness, or discoloration. Remember to pay attention to both the lenses and the surrounding areas, as yellowing can extend beyond the immediate surface of the headlights.
Next, run your fingers gently across the surface of the headlights. Do you feel any rough patches, pits, or cracks? These could be indicators of more severe damage that may require additional attention. Take note of any areas that feel rough or uneven, as they may need extra care during the cleaning process.
Now, step back and assess the overall brightness and clarity of your headlights. Are they emitting a clear, bright light, or do they appear dim and diffused? Comparing the brightness of your headlights to when they were brand new can give you a better idea of how much yellowing has occurred.
Lastly, consider any external factors that may be contributing to the yellowing of your headlights. Do you frequently park your car in direct sunlight or harsh weather conditions? Are you often driving on dusty or gravelly roads? Identifying these factors can help you understand why your headlights may be yellowing and take steps to prevent further damage in the future.
By thoroughly assessing the condition of your headlights, you’ll be better equipped to choose the most effective cleaning methods and products to restore them to their former glory. So grab your magnifying glass and let’s get started on the journey to follow the steps of the guide on how to clean yellow headlights at home.
DIY Cleaning Solutions
Now that you’ve assessed the condition of your headlights and are ready to tackle the task of how to clean yellow headlights at home, it’s time to gather your cleaning supplies. But don’t worry, you won’t need any fancy equipment or expensive products, just a few simple ingredients from around the house will do the trick.
One of the most popular DIY cleaning solutions for yellow headlights is a mixture of baking soda and vinegar. Baking soda acts as a gentle abrasive, helping to remove surface oxidation and yellowing, while vinegar helps to break down stubborn grime and residue. Simply mix equal parts baking soda and vinegar to form a paste, then apply it to the surface of your headlights using a clean cloth or sponge. Gently scrub the headlights in a circular motion, focusing on areas with the most yellowing. Rinse off the paste with water and dry the headlights thoroughly with a clean towel.
Another effective DIY solution is toothpaste. Yes, you read that right toothpaste isn’t just for keeping your pearly whites sparkling. Choose a non-gel toothpaste with baking soda for the best results. Using a clean cloth or sponge, apply a small amount of toothpaste and wipe it in circular motions over the headlight surface. Continue rubbing for a few minutes, then rinse off the toothpaste with water and dry the headlights thoroughly. The mild abrasives in the toothpaste help to buff away surface oxidation and restore clarity to your headlights.
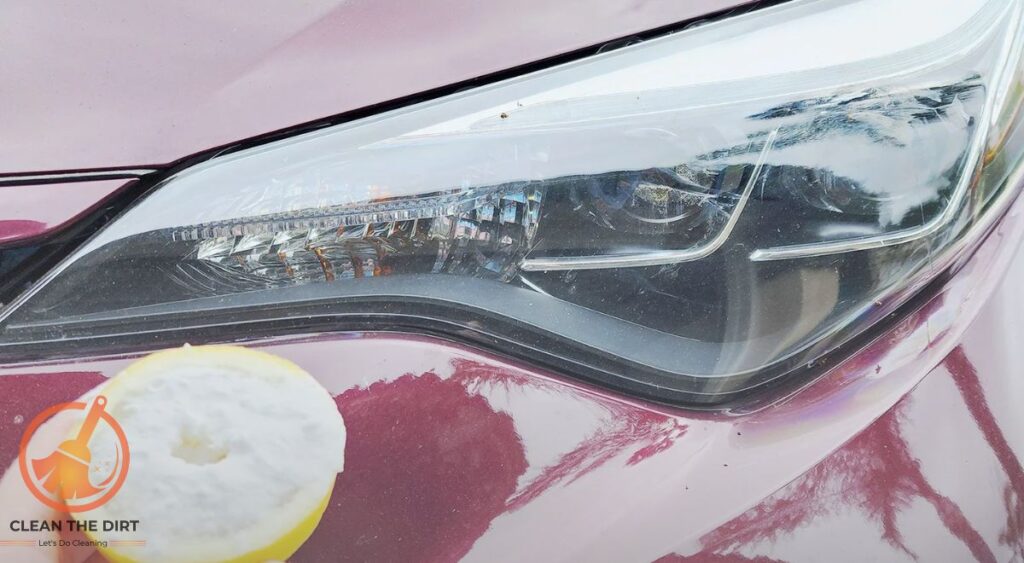
For those looking for a more natural approach, lemon juice can also be an effective cleaning solution. Lemon juice contains citric acid, which helps to break down dirt and grime on the surface of your headlights. Simply cut a lemon in half and rub it directly onto the headlights, squeezing gently to release the juice. Allow the lemon juice to sit for a few minutes, then rinse it off with water and dry the headlights thoroughly. You’ll be amazed at how bright and clear your headlights look after this simple treatment.
Whichever DIY cleaning solution you choose, be sure to follow up with a protective coating to help prevent future yellowing. Applying a layer of car wax or UV-resistant sealant can help to shield your headlights from the elements and keep them looking clear and bright for longer. With these simple DIY solutions and the instructions in this guide on how to clean yellow headlights at home, you’ll have your headlights shining like new in no time, and all from the comfort of your own garage.
How to Clean Yellow Headlights at Home? Step-by-Step Cleaning Process
Now that you’ve gathered your cleaning supplies and are armed with DIY solutions, it’s time to roll up your sleeves and dive into the step-by-step process of how to clean yellow headlights at home. With a little patience and effort, you’ll have your headlights looking bright and clear in minimum time.
Step 1: Preparation
Before you begin, make sure your car is parked in a well-lit area and the headlights are cool to the touch. Gather your cleaning supplies, including your chosen DIY cleaning solution, a clean cloth or sponge, water for rinsing, and a towel for drying. It’s also a good idea to protect the surrounding areas with masking tape or plastic sheeting to prevent accidental damage.
Step 2: Application of Cleaning Solution
Dip your clean cloth or sponge into the DIY cleaning solution of your choice whether it’s the baking soda and vinegar paste, toothpaste, or lemon juice. Apply the solution evenly to the surface of your headlights, focusing on areas with the most yellowing. Use circular motions to gently scrub the headlights, working the solution into the surface to remove oxidation and grime.
Step 3: Scrubbing and Polishing
Depending on the severity of the yellowing, you may need to scrub the headlights for several minutes to achieve the desired results. Be patient and persistent, and don’t be afraid to apply a little extra pressure to stubborn areas. As you scrub, you’ll begin to notice the yellowing lifting away, revealing brighter, clearer headlights underneath. Once you’re satisfied with the results, rinse off the cleaning solution with water and pat the headlights dry with a clean towel.
Step 4: Final Touches
After cleaning and drying your headlights, take a moment to inspect them for any remaining yellowing or residue. If necessary, repeat the cleaning process or target specific areas with a second application of your chosen DIY solution. Once you’re happy with the results, apply a protective coating of car wax or UV-resistant sealant to help prevent future yellowing and keep your headlights looking their best for longer.
Step 5: Admire Your Handiwork
Stand back and admire the transformation. Your once-yellow headlights are now shining bright and clear, ready to light the way on your next night-time drive. Take pride in knowing that you’ve handled the task of how to clean headlights at home with skill and determination and enjoy the improved visibility and safety that come with it.
The Science Behind Yellowing Headlights
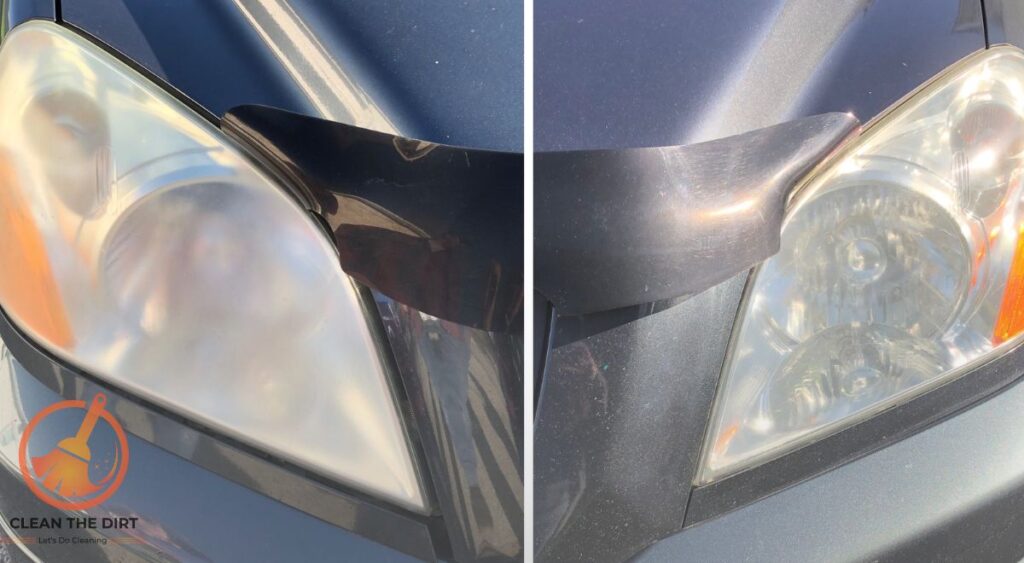
Ever wondered why your headlights seem to lose their luster over time and take on that frustrating yellowish tint? Let’s shed some light on the science behind this phenomenon, and how understanding it can help you handle the task of how to clean yellow headlights at home.
You see, headlights are typically made from polycarbonate plastic, a durable material that’s resistant to impacts and scratches. However, it’s not resistant to the effects of the environment. Over time, exposure to sunlight, moisture, and other elements can cause a chemical reaction on the surface of the plastic, leading to oxidation.
But what exactly is oxidation, and how does it turn our once-clear headlights into a shade of yellow? Well, think of oxidation as a natural process where oxygen molecules interact with the molecules in the plastic, causing them to break down and form new compounds. This process is accelerated by exposure to UV rays from the sun, which can degrade the protective coating on the surface of the headlights.
As oxidation progresses, it creates microscopic pits and cracks on the surface of the plastic, scattering and diffusing the light that passes through. This scattering effect is what gives headlights that cloudy, yellow appearance, reducing their brightness and effectiveness.
So, why is understanding the science behind yellowing headlights important when learning how to clean yellow headlights at home? Because it helps us choose the right techniques and products to effectively reverse the damage. By targeting the underlying cause of the yellowing – namely, oxidation – we can restore clarity and brightness to our headlights and improve visibility on the road.
Safety Precautions and Tips
Before you jump into the exciting task of how to clean yellow headlights at home, it’s important to keep safety in mind. While headlight cleaning is a relatively simple process, it’s essential to take the necessary precautions to protect yourself and your vehicle. Here are some handy tips to ensure a safe and successful cleaning experience.
1. Wear Protective Gear
Before you start cleaning, it’s a good idea to put on a pair of gloves to protect your hands from any harsh chemicals in the cleaning solutions. Additionally, consider wearing safety glasses or goggles to shield your eyes from splashes or debris.
2. Work in a Well-Ventilated Area
Some cleaning solutions may produce fumes or odors that can be irritating to your respiratory system. To avoid inhaling these fumes, work in a well-ventilated area, such as outdoors or in a garage with the doors open.
3. Avoid Harsh Chemicals
When choosing your DIY cleaning solution, pick gentle, household ingredients like baking soda, vinegar, toothpaste, or lemon juice. Avoid using harsh chemicals or abrasive cleaners, as these can damage the surface of your headlights and surrounding areas.
4. Test in a Small Area First
Before applying any cleaning solution to your headlights, it’s a good practice to test it in a small, hidden area to ensure it doesn’t cause any adverse effects. This can help prevent any unexpected damage or discoloration.
5. Use Gentle Pressure
While scrubbing your headlights, remember to use gentle pressure to avoid scratching or damaging the surface. Applying too much force could cause more harm than good, so take your time and let the cleaning solution do the work.
6. Rinse Thoroughly
After cleaning your headlights, be sure to rinse them thoroughly with water to remove any leftover cleaning solution or residue. Leaving residue on your headlights could cause streaks or discoloration, so take the time to rinse them off completely.
7. Dry Completely
Once you’ve rinsed your headlights, use a clean towel to dry them completely. Leaving them wet could lead to water spots or streaks, detracting from the clarity and shine you’ve worked so hard to achieve.
8. Apply Protective Coating
After cleaning and drying your headlights, consider applying a protective coating of car wax or UV-resistant sealant. This will help to maintain the clarity and brightness of your headlights for longer, while also providing an extra layer of protection against future yellowing.
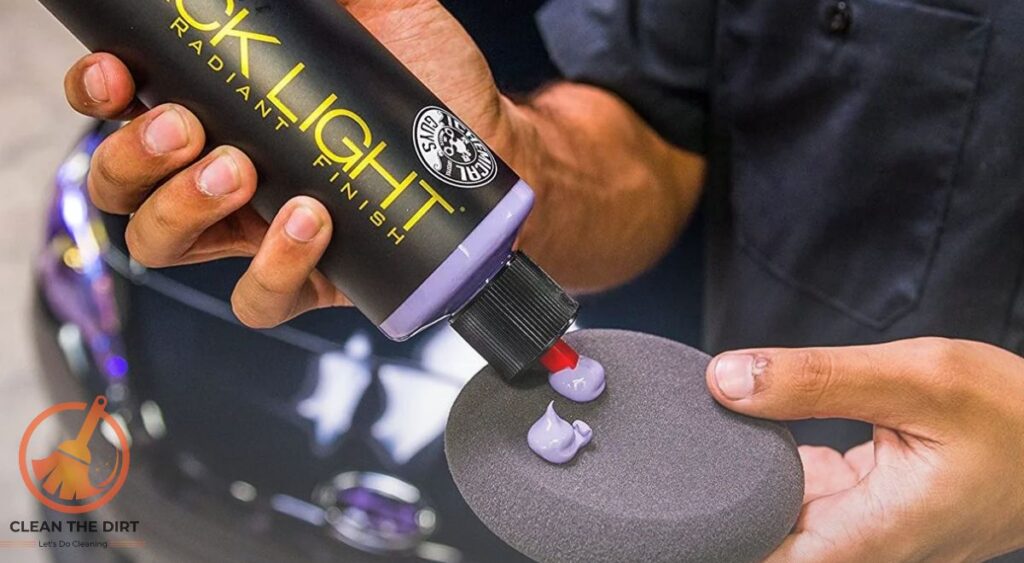
By following these tips in the guide on how to clean yellow headlights at home, you can completely protect your eyes, hands, and other parts of your body from being harmed by harsh chemicals.
Maintenance and Long-Term Care
Congratulations on successfully restoring your headlights to their former glory. But the guide on how to clean yellow headlights at home doesn’t end there, now it’s time to talk about maintenance and long-term care to ensure your headlights stay bright and clear for miles to come. Here are some human-friendly tips to keep your headlights shining like new.
1. Regular Cleaning
Just like any other part of your car, your headlights benefit from regular cleaning to remove dirt, grime, and debris that can accumulate over time. Make it a habit to clean your headlights whenever you wash your car, using gentle soap and water or your preferred DIY cleaning solution.
2. Protective Coating
After cleaning your headlights, consider applying a protective coating of car wax or UV-resistant sealant. This will help to shield your headlights from the elements and prevent future yellowing or damage caused by UV rays, dirt, and environmental pollutants. Reapply the protective coating every few months for optimal results.
3. Park in the Shade
Whenever possible, try to park your car in a shaded or covered area to minimize exposure to direct sunlight. UV rays from the sun are a major culprit behind yellowing headlights, so reducing exposure can help prolong the clarity and brightness of your headlights.
4. Avoid Harsh Chemicals
When cleaning your car, be mindful of the products you use around your headlights. Avoid harsh chemicals or abrasive cleaners that can damage the surface of your headlights and strip away protective coatings. Stick to gentle, automotive-approved cleaning solutions to ensure the longevity of your headlights.
5. Check for Damage
Periodically inspect your headlights for any signs of damage, such as cracks, chips, or moisture buildup inside the lens. Addressing these issues promptly can prevent further damage and prolong the lifespan of your headlights. If you notice any damage, consider seeking professional repair or replacement.
6. Upgrade to LED
If your car still has traditional halogen headlights, consider upgrading to LED headlights. LED headlights are more energy-efficient, brighter, and longer-lasting than halogen headlights, providing improved visibility and safety on the road. Plus, they’re less prone to yellowing and discoloration over time.
7. Stay Proactive
Finally, stay proactive when it comes to headlight maintenance. Keep an eye on the condition of your headlights and address any issues promptly to prevent them from worsening. With a little regular maintenance and consistency for acting on this guide on how to clean yellow headlights at home, your headlights will continue to shine bright and keep you safe on the road for several years to come.
Conclusion
Now you’ve successfully learned how to clean yellow headlights at home and brought back the brilliance to your car’s front end. Pat yourself on the back for taking the initiative to tackle this DIY project and restore your headlights to their former glory.
But beyond just achieving shiny headlights, you’ve also gained valuable knowledge about car maintenance and care. You now understand the science behind yellowing headlights, the importance of regular cleaning and maintenance, and the steps needed to keep your headlights looking bright and clear for miles to come.
By taking a proactive approach to headlight care, you’re not only enhancing the appearance of your vehicle but also prioritizing safety on the road. Clear, bright headlights improve visibility, making it easier to see and be seen by other drivers – especially during dark-time driving or wild weather conditions.
So as you admire your handiwork and enjoy the improved visibility on your next nighttime drive, remember the journey you’ve taken to achieve this result. You’ve learned how to assess the condition of your headlights, choose the right cleaning solutions, and implement proper maintenance techniques to keep them shining like new.
And if you ever find your headlights starting to lose their luster again, you now have the knowledge and confidence to manage the task of how to clean yellow headlights at home. Armed with your DIY cleaning solutions and maintenance tips, you’re well-equipped to keep your headlights bright and clear for many years.
Take a look at the table which indicates the headlight cleaning methods and their effectiveness.
| Cleaning Solution | Ingredients | Effectiveness | Ease of Use | Cost |
|---|---|---|---|---|
| Baking Soda & Vinegar | Baking soda, vinegar | High | Moderate | Low |
| Toothpaste | Non-gel toothpaste | Moderate | High | Low |
| Lemon Juice | Fresh lemon juice | Moderate | High | Low |
So go ahead and hit the road with confidence, knowing that your headlights are shining bright and keeping you safe every step of the way. And remember the journey to clean, clear headlights starts right at home. So why wait? Grab your cleaning supplies and get ready to illuminate the night with your bright, shiny headlights.
Frequently Asked Questions (FAQs)
Why do headlights turn yellow over time?
Headlights can turn yellow due to oxidation, UV exposure, environmental pollutants, and general wear and tear. These factors cause the protective coating on the headlights to degrade, leading to yellowing and reduced clarity.
Is it safe to clean yellow headlights at home?
Yes, it’s safe to clean yellow headlights at home as long as you use gentle cleaning solutions and follow proper techniques. Avoid harsh chemicals and abrasive cleaners that can damage the headlights.
Can I use household items to clean yellow headlights?
Yes, many household items can be used to clean yellow headlights effectively. Baking soda, vinegar, toothpaste, and lemon juice are popular DIY cleaning solutions that can help remove oxidation and yellowing.
How often should I clean my headlights?
It’s a good idea to clean your headlights whenever you notice a significant buildup of dirt, grime, or yellowing. Regular cleaning can help maintain clarity and prevent yellowing from worsening over time.
Will cleaning my headlights improve visibility at night?
Yes, cleaning your headlights can improve visibility at night by removing dirt, grime, and oxidation that can obstruct the light output. Clear headlights provide better illumination, allowing you to see the road more clearly.
Do I need to apply a protective coating after cleaning my headlights?
Applying a protective coating, such as car wax or UV-resistant sealant, after cleaning your headlights can help maintain clarity and protect against future yellowing. It’s a good idea to reapply the protective coating every few months for optimal results.
Can I use a power tool or machine to clean my headlights?
While power tools or machines can be used to clean headlights, it’s important to use them with caution to avoid damaging the headlights. Always follow the manufacturer’s instructions and start with the lowest setting to prevent scratching or etching the surface.
How long does it take to clean yellow headlights at home?
The time it takes to clean yellow headlights at home depends on the severity of the yellowing and the cleaning method used. In general, it can take anywhere from 30 minutes to an hour to clean and restore headlights to their former clarity.
You May Also Like: How to Clean Rust Off Blackstone? Expert Tips for Restoring Your Grill’s Shine


